Thursday, October 30, 2014

Thursday Miscellany


HAPPY HALLOWEEN!
Pic from here

TOC

Star Blogger

I've heard from a number of folks who have received their Dec 2014/Jan 2015 issue of Vogue Pattern Magazine (VPM).

Yes, I was thrilled when I learned I was going to be featured in the Star Blogger column!

If you subscribe, the Star Blogger feature is on pages 12 and 13.

I was very touched by the piece that Kathy Marrone, the editor in chief, wrote about me.

If you don't subscribe, you might want to. This issue includes an article by Marcy Tilton on the perfect patch pocket, another on fabric-related shopping in Portland (I'm hoping to take a trip there next Spring), a profile on the Curvy Sewing Collective (written by Carolyn Norman!), and an article on irons and ironing boards.

I want to thank my photographer: Mary "mem" Campione! I still sometimes take my own photos in the alley behind my house using my tripod and remote, but the more fun and interesting photos at work are taken by mem. We usually do our little photo shoots on Monday mornings—we both get to work early. mem has a great eye and makes the process a lot of fun. For this feature, she took the photos of the grommet coat and those taken in the giant Adirondack chair.

Photo by mem

You can also buy a single issue of VPM, either on the newsstand, or a digital version for an iPad or other tablet device through the App store.

(And welcome to the new readers who found me through VPM!)

Check Out This Blog: Domestic Deb

I am always on the lookout for new blogs that excite me, and I was definitely excited to find Domestic Deb and, in particular, her fabulous version of Katherine Tilton's jacket!

Check it out!

Thread Cult

Be honest with me, have I been hiding under a rock?

When I read back through every post on Domestic Deb's site (it's a pretty new blog, so it wasn't hard to do), I learned about the Thread Cult. This site has interviews of all sorts of interesting sewing luminaries, such as Claire Shaeffer, Susan Khalje, and Natalie Chanin. (Seriously, what rock was I under to have missed this?!)

You can also subscribe to Thread Cult in iTunes and listen on your phone or tablet.

Grim Ripper

I no longer quilt, but I just loved this little wall hanging of the Grim Ripper!!! It's a free download on the Fons and Porter website. (And I just might make an exception, as this would be so cute on the wall of my sewing room.)

Monday, October 27, 2014

New Closet Workhorse - Black Textured Burda Vest


TOC

Fabric Detective

This is a project that was entirely motivated by a unique piece of fabric.

I received 1.5 yards of this novelty fabric from Marcy Tilton—it was all she had left, but it was 60" wide, so I immediately started thinking about how I could make the most of a smallish, but fabulous, piece.

While this fabric might look like a conventional black fabric in some of the pics, it is a very interesting textile. At a casual glance, I thought it was two fabrics that had been fused together. One layer was furry and the other layer was a lightweight satin fabric with a slight sheen. The furry piece has oval-shaped "holes" where you can see through to the satin side, and there is zigzag stitching around each oval—presumably to keep the two layers together. The furry side is intended to be the "right" side, but I loved the other side even more.

The "right" (furry) side on the left, the "wrong" (textured) side on the right. There was a lot of afternoon light when I took this pic, which is why there is so much reflection.

As I thought about it further, I realized that my assumption had to be wrong. What had created that highly textured surface on the wrong side? Using some scissors and a seam ripper, I deconstructed a small piece of the fabric.

And it turns out that my first assumption was wrong! The base layer of fabric is a lightweight poly satin fabric, and loosely plied yarn is set into the base fabric to form the fur! There is a machine zig-zag around each oval, probably to help anchor the "fur" in place and, I believe, the right side of the fabric was brushed to make the fur more... furry... and to hide the individual yarns. (As a result, the fabric does have a nap.)

  • Left: The "wrong" side of the fabric, showing the holes in the base fabric after the "fur" has been removed from the upper left corner
  • Right: The "right" side of the same piece of fabric

Fascinating!

The Challenge

I gave myself the following challenge:

  • Make the best use of the limited yardage, mixing it with other fabrics if needed.
  • Feature both sides of the novelty fabric, though predominantly use the back side, which is my favorite side.
  • For comfort, incorporate some stretch into the garment (the novelty fabric has no stretch).
  • Make something that I wear get loads of wear out of.
Wearing my favorite purchased jacket as it begins to snow in Santa Fe

Inspiration

My favorite garment that I ever purchased is a black wool jacket. This piece (which I bought at a huge discount) uses a novelty fabric that features strips of fringed wool. I wear this jacket all of the time—it's rare for a week to pass without me wearing it at least once, and often more than once. One of these days I will trace off this pattern (which has interesting seamlines) but, until then, I mulled over which aspects of the jacket appeal to me. These features include: the stand-up collar, the length, the presence of pockets, the front 2-way zipper, the color (black goes with almost everything) and, of course, the texture of the fabric.

I am crazy for the texture.

I decided to make something which had many of the same features, to maximize its usefulness in my wardrobe. Because I had a limited amount of fabric, I planned to also include a second fabric, also in black, as I didn't want high contrast. After much dithering (I was trying to decide between a black crepe double-knit and a black stretch taffeta), I decided to go with the taffeta, because the slight sheen of the taffeta echoed the sheen of the satin in the novelty textile. And what about sleeves? Rather than use the contrasting stretch taffeta for the sleeves, I decided to make a vest.

Pattern

My next decision was which pattern to use.

One day, while working in the SF office, I made a lunchtime visit to Nordstroms in Union Square. I tried on outerwear garments in the Eileen Fisher department, including a vest similar to the one I ended up making. It had: princess seams front and back, and the front featured an off-bust princess seam (meaning there is a dart from the princess seam to the bust point), a zip front, and the stand-up collar that I love. I was inspired to look for a similar pattern, but such a pattern was nowhere to be found in Vogue or Burda envelope patterns. I then found a special Burda issue from Fall/Winter 2013 that had the exact silhouette I was looking for. Unfortunately, the design only went up to a size 44; meaning that I had to trace it off, grade it up, and increase the FBA.

Burda Classics Fall/Winter 2013

I used jacket 0011 to make my vest

This was enough altering to warrant a muslin, but it was worth the effort.

I will add that, as I was later searching Ebay and Etsy, I found the exact same Burda offered as an envelope pattern. It's OOP, but well worth tracking down.

Burda 7582

Cutting it Out

I cut the novelty fabric out carefully, in a single thickness. I cut out the pattern pieces as follows:

  • The center front and center back were cut from the BACK (textured side) of the novelty fabric.
  • The collar and front facings were cut from the FRONT (furry side) of the novelty fabric, so that you see the furry side when I wear the collar folded back.
  • The side fronts, side backs, and back lining were cut from the stretch taffeta.

Fit

I've already mentioned how Georgene helped me perfect the fit. At that point I had to do much thread tracing to capture her edits and then to translate them back to the paper pattern (for future use). I also ended up re-cutting the side back pattern pieces, but I had plenty of the stretch taffeta, which I also used for the lining.

Thread tracing on the side front and side back (stretch taffeta)

Thread tracing on the center front and center back (Marcy Tilton novelty fabric)
Trimming the left front to match the right front

Zippers

I wanted to use a 2-way separating zipper for the front and coordinating one-way zippers for the zipper pockets. I already had two brass zippers in my stash from another planned, but not executed, project. To go with those, I ordered a brass toothed, two-way, separating zipper, in black, cut to 26-1/2", from Zipperstop. I also ordered a brass foxtail slider. (If you do this, make SURE that you ask them to put the slider ON to the zipper. I once forget and I received an envelope with the zipper and the slider, but not together. I had to put them together myself, which is a real PITA.)

Construction

The vest came together well, but it took me a few weekends. The jacket pattern is unlined and I wanted a lined vest, so I had to do my own lining. I drafted the zipper pockets and placed then where I liked. I used leftover fabric (which you may recognize) from another project for the pockets. (The reverse side of this fabric is solid black, so the inside of the pockets are black.)

In process, showing the pocket from the inside. You can see both sides of the novelty fabric pretty clearly.

Pocket up close

Conclusion

Did I accomplish my goals? Yes, I think so. I like that you can see the furry side of the fabric at the outside of the collar and when the neckline is folded open. The stretch taffeta provides some "give". Only time will tell if I do get a lot of wear out of this, but I am hopeful!

I love a 2-way zipper!

Thank you to my colleague, Mary Campione, for taking these pics!

The End!
In truth, Mary thought you might want to see this Oska hat (from several years ago) up close.

Tuesday, October 21, 2014

Get OFF My Internets!!


I had to think for awhile before writing this post. After all, the world has enough negativity, doesn't it?

But, actually, there's negativity and there's constructive criticism, not to mention looking out for the consumer.

Have you heard of GOMI?

GOMI is an acronym for "Get Off My Internets". It's a forum that was created some time ago and was brought to my attention by two different bloggers many months ago. At first I looked at it rarely but it has become an almost daily ritual to check it out.

GOMI is a site that critiques bloggers. They critique all sorts of bloggers, like lifestyle bloggers, food bloggers, wedding bloggers, mommy/daddy bloggers and, of course, crafting bloggers.

Now, it might seem mean to go after bloggers. I mean, putting yourself out there on a blog can be very hard. Generally, the more compelling a blog, the more vulnerable the blogger has made herself. (Not always, but often.)

Except GOMI (at least on the crafting forum, I don't read the other forums), tends to go after blogs where the blogger is trying to monetize their blog. They specifically go after folks who sell products (be it books or patterns) that are not really ready for prime time. Particularly when said products are being hyped (loved without criticism) on blog tours, for example.

As a result, many of the blogs they snark about are not blogs that I follow, but it's still interesting.

Have I been called out on GOMI?

Why, yes I have!

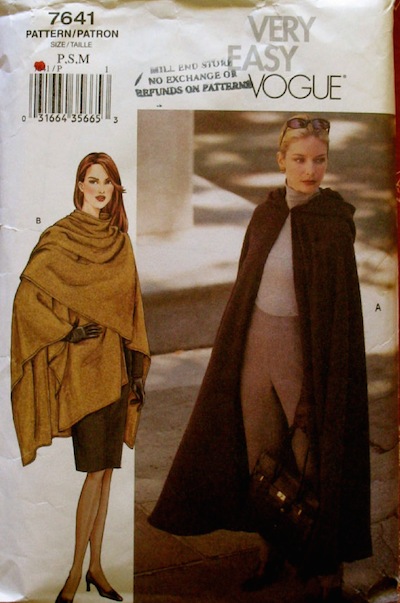
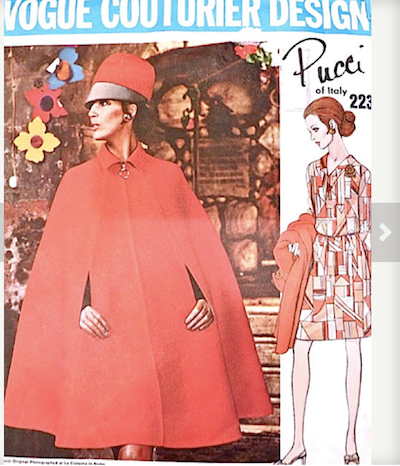
When the Vogue thread was created (quite some time ago), the poster who originated the thread claimed that I had hated on Vogue, then they flew me out to Puyallup and, as a result, I'd sold out. Other posters defended me, saying that, no, I never actually hated on Vogue, but was giving them constructive criticism. Somewhere around page 11 of the thread, the original poster said she re-read my posts and she agreed. I was happy to see her redaction because, while I love Vogue and would be devastated to see them shut their doors (shudder), they have never so much as given me a free pattern. And they shouldn't, as they need the sales. In fact, if they tried to at this point, it would be weird.

Am I kinder to Vogue now? I'm not sure. Maybe. Not consciously, at any rate, though the fact that I met many of them in person and liked them has to factor in somewhere. It was a savvy move on their part to reach out to folks who were criticizing their products (not just me, by the way).

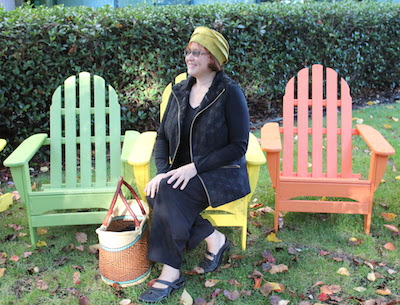
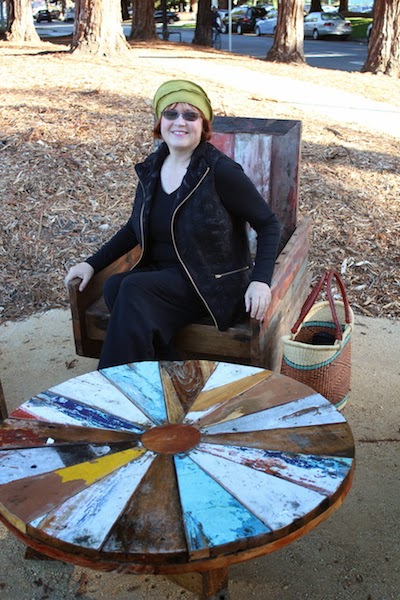
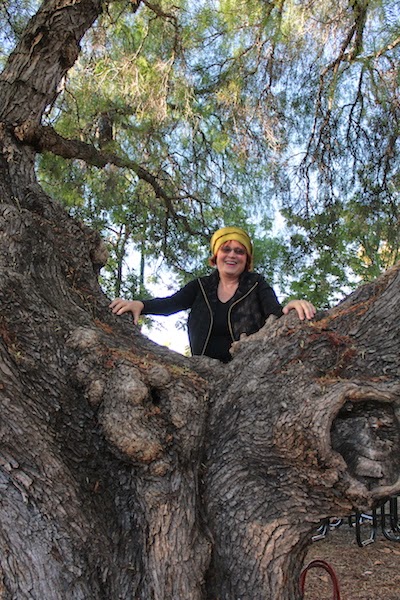
My other mention on GOMI was from a poster who said that I seemed nice (thank you!) but that I had "damned saggy boobs."

Cartoon from here.
(In fact, googling "old lady cartoon" is very enlightening.)

Ummm. OK.

Now, this might seem like a personal attack and, it sort of borders on that, but GOMI, as a rule, doesn't personally attack a blogger about weight, body issues, race, gender, orientation, and so on. (I'm not saying that it never happens, but it's not what they are about.) So I sat on this comment for awhile. I looked at some of my posted photos. I really don't think that, in general, my boobs are saggy, but I'm not saying that it was a totally invalid comment.

If you don't have a large bust, maybe you don't know how heavy those "lady boulders" can be. (I've always wondered, are fake boobs equally heavy?) Even when I move the slider all the way down on my bra strap in the morning, by evening, it's moved all the way up. And putting on a bra where the slider is all the way down is not comfortable, let me tell you. There is some happy medium.

So, I did a little adjustment to my bra straps that I will share with others who might have this problem. I adjusted the straps where I like and sewed through them.

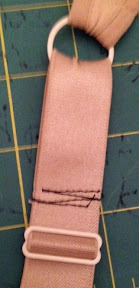
Problem solved, and hopefully no more:

Cartoon from here

Though I make no promises. :)

Constructive criticism is a good thing and far too rarely solicited, or welcomed, these days. If I were trying to make a business out of my hobby, I would listen to it, and evaluate whether it was fair, whether I could do something different. Try to isolate the truth from the hurt feelings that the feedback created.

For example, as a technical writer, I sometimes get feedback that the docs aren't clear. Perhaps someone claims that we didn't warn them about X or tell them about Y. Sometimes, the feedback is wrong. I did warn them about X and told them about Y. But that's not good enough. If the docs aren't clear, and people are missing important information, then they need to be reworked so that people won't be tripped up. Even if the feedback was technically incorrect.

I think that GOMI is providing a useful service for the consumer.

So, if I earned money off my blog, I would listen to the criticisms on GOMI and look for nuggets of truth, to see where I could do better.

If you decide to participate in, or read, GOMI let me provide some useful acronyms (and one definition) for you:

GOMI
Get Off My Internets. Used to acknowledge the blogs they dislike and generally don't read. (Though clearly they are reading them some of the time!)
Hate reads
Blogs they still read, generally in order to criticize. Some of them seem to have a blog roll dedicated to the blogs they dislike, in order to isolate them from the blog roll filled with their favorite blogs. Pretty clever, but more work than I would bother with.
WK
White Knight. A poster might "WK" (defend) a blogger.
SBC
Sewing Blog Community
SOMI
Stay On My Internets. Used to acknowledge the blogs they like. I've found some nice blogs this way.

Also, GOMI has done something unusual: They have, collectively, started their own blog! At first, I thought it was a joke, but it's not. Check out Sew Sorry Sew Fat and see their rules for blogging. In fact, yesterday they posted tongue-in-check advice on how to write a GOMI-worthy sewing blog.

By the way, I do not have a login on GOMI, so I have never commented there. I've been tempted to weigh in a few times, but I am just a spectator.

Monday, October 20, 2014

Capes Galore


TOC:

Have you noticed how capes are "in" at the moment? This is not the first fall/winter season where they've been featured, but this is the year I am noticing them more, especially worn by women in downtown SF, or on the subway.

I've been wanting to make a cape for awhile, though capes can be tricky to wear. Depending on the style, a seat belt can be a challenge, for example, as can a shoulder-strap- or cross-body purse.

I've been thinking about different styles of capes. You can go to any e-tailer, like Nordstroms.com, and enter "cape" into the search field and see capes galore.

For this little survey, I reviewed cape patterns on ebay and etsy. Capes (and ponchos, which are similar) were a big trend in the 70s—"my" high school era—but capes are well represented in all decades since home sewing patterns have been available.

A cape is basically a body tent and the challenge with a cape is: what to do with the arms and hands? It seems to me that most capes fall into one of three categories, vis-à-vis hands:

The Royal

This style of cape hangs on the shoulders and has no accommodation for hands.

That means that the wearer's hands have to emerge from the center front. This form of cape is used more for drama (opera, weddings, costumes) than for warmth in polar climates. This cape is a bit fussy to wear, but worth it for the drama, perhaps...

[Let's pause one moment for a quick trip down memory lane: When I was a teenager in the mid 70s, my next door neighbor had an older daughter who was engaged. I will never forget her gown. For her December wedding, she designed something special: a full length white velvet cape with a dramatic hood, lined in red and trimmed in white fur. It was cut longer in back, forming a train. I don't recollect that she wore anything underneath, as it did close, but there must have been some short of sheath, as shown in the following YSL ensemble. My teenaged heart went pitter patter for this gown and the idea of a December wedding, which I had never heard of before.]

Examples of this style of cape include:

Yves Saint Laurent


These patterns often feature a ruana view, which is worn more like a stole

The Poncho

In the poncho style, the arms emerge from under the hem. For this to work, the cape is generally shorter on the sides, or all around.

Another trip down memory lane: My mother, an accomplished seamstress, made a short cape from white faux fur back in the 70s. The cape buttoned and I wore it to several events (which I can no longer precisely remember).

Examples of this style include:

Fabulous neckline!


The Red Riding Hood

In the first two styles, there is no modification to the pattern for arms and hands. In this style, some form of slit allows the wearer's hands to emerge, while keeping the cape closed, if desired. The slit may land in a seam, or it might be a free-standing welt.

Depending on the location of the slit, this can be the hardest style to wear, as it can greatly limit mobility. At least that's what I remember from back in the 70s...

Designers seem to love this style. Examples include:

Pucci!

Givenchy!

DKNY (current pattern)

I love how the hand emerges from the welt and then slides into a patch pocket.
A clever detail.

Style Arc design (current pattern)

Interesting Variations

I saw a couple interesting cape variations that deserve special mention.

This cape has cuffs, forming a batwing silhouette.

This pattern claims that you can wear it as a cape OR a skirt!
I wonder how feasible that is in real life...

What to Choose?

Have I chosen what kind of cape to make?

Why, yes I have. :) I hope to have something to show soon, but I will say that mine fits into the "poncho style" category.

What about you? Is a cape in your future? Or maybe you acquired one in the last year or two? Or maybe you were "caped out" in the 70s and can't go there again?