Sometimes things just don't work out the way you envisioned. It feels as if I've been working on this garment for a month. It took me awhile because it is an involved garment, but also there was a lot going on in my home life and in my work life. Plus, the silk charmeuse lining was such a pain to sew, that I had to really force myself to keep working on it.
And, in the end, it's pretty much "meh."
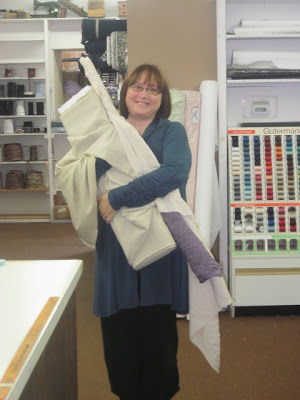
I bought the fabric, both the fashion fabric and the lining - on my recent trip to FabricMart. You can see me clutching both bolts here:
The outside is a Nicole Miller fabric (no longer available). From the FabricMart website:
This tan with cream thread pin-striping running from selvage to selvage is 57% linen 24% rayon 18% cotton 1% Lycra from Nicole Miller. It is lightweight, semi-sheer, has a slight luster, a textured hand, and medium cone drape. This will make a beautiful jacket. It could also be used for a skirt, top, or a dress.The lining is a silk charmeuse from FabricMart's "as-is" table. It contains a tiny bit of lycra - probably no more than 1%.
I wanted the stripe running vertically, also the stretch was greater across the ribs, so I cut it cross grain. I didn't have quite enough of the lining fabric, so I had to cut a couple of the pieces cross grain. The silk charmeuse lining was a huge pain to sew and caused some of the problems I experienced later.
The pattern, a dress by Chado Ralph Rucci, was released in the recent batch of spring Vogues. I loved the dress but knew it would not work on me as a dress. But as a long jacket/duster, I could see that on me.

Alterations and Modifications
- This dress is designed as a wrap dress. As such, the left front is shaped differently than the right front. The left front is wider and is finished with a tie that is hidden on the inside. So there is a left front and a right front, and a left front facing and a right front facing. To make this work as a duster, I used the right front (pattern piece #1) and the right front facing (pattern piece #13) for both the left and the right, removing the asymmetry.
- I made the largest size, a size 20. The finished measurement printed on the pattern sheet told me that it would be just barely big enough at the bust, but I could not figure out how to do the FBA on this pattern, which is designed in a very interesting manner. The shoulder seam and the seam to the front of the shoulder are created with angled darts. There is a side piece that extends from hem to sleeve hem. It is inserted into the garment similar to a gusset, with corners that you reinforce and then snip. There are 8 of these corners, 2 in front, 2 in back, and ditto on the lining. This makes the garment tricky to construct and tricky to alter. In the end, I decided to punt on the FBA. I could have used the extra fabric, but it's really the least of my problems.
I did not change the sleeve length. If you look at the pattern, you will see that it's a cropped sleeve, but on me, it's full length. I usually have to shorten the sleeves, so that worked in my favor because I like the longer length.
Construction Notes
- This garment is fairly involved to sew. That is because virtually each seam requires the following steps:
- Sew the seam.
- Press the seam flat.
- Press the seam open.
- Press the seam to one side (in the direction specified by the pattern).
- Edgestitch the seam.
- Topstitch the seam.
- Press the topstitched seam.
- Sew the seam.
- The outside is fully constructed, and then the lining is fully constructed, except for a segment of one of the horizontal band seams which is left unstitched. They are then joined at the outer edge and turned through the unstitched segment. Then, the trickiest bit, is to sew the sleeve hems through the unstitched opening. I had a heck of a time understanding the instructions for this bit and I read them over and over. Finally, when I had it in front of me I was able to work it out. But it is something like sewing a notched collar, because this tulip shaped sleeve hem has four seams that come together at one point.
At first I wanted the option of wearing it open or closed, so I put a button loop on one side and chose a button from my "good" button box. But since I did not do an FBA, I didn't really like how it looks closed (I can close it without a problem, but it doesn't lay properly), so I may just snip off the button loop.
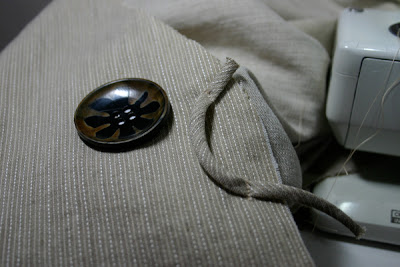
The bias button loop and the button I was going to use, before I decided I preferred it without. Here you can see the wonderful ribbed texture of the linen/rayon/cotton/lycra blend.
Challenges... and Solutions
Perhaps you anticipate the problem I had. The shell and lining are attached only at the outer edge. Though I tried to be very careful when sewing all seams, these fabrics don't behave the same, and they did not hang well together. The lining was shorter than the shell, so the hem pulled inward in an inconsistent and very unattractive way. If it had bubbled in an interesting way, I would have run with that. :)Also, the facing at the front and the sleeves "fell" out as I moved, or put the duster on/took it off. It is a very unpleasant effect. Of course this garment was not designed as a duster/jacket, but even as a dress I think this would be annoying.
At this point, I almost called it a wadder. But, finally, I opened up most of the horizontal seam at the top of the upper band. I tacked the lining below to the jacket itself. The upper lining is currently loose (and shorter, so some of the seams are exposed), but I plan to add a piece to the hem at the top that will lay over the bottom area. It will be loose, unattached at the bottom, but will cover up the works.
To fix the loose, floppy facings, I tacked them down. If you look at the photo you will see that I am wearing a necklace. I bought this inexpensive necklace from a website, and when it arrived one of the seed bead strings was broken. I almost sent the necklace back, but decided not to bother. Instead, I snipped off the loose strand of seed beads. These beads are a bronze color and were sitting near my sewing spot in the living room. I decided to use them to tack down the facings along the front, the sleeve hems and at the back of the neck. I used them in clusters of three. It worked ok, though it's not a perfect solution.

A closeup of the beading intended to tack the facings down.
The final problem I have with this duster is the fit of the neck. I have to frequently tug the duster forward. The neck seems to be too narrow and/or the shoulder "dart" should be further back. Not much I can do about that now, but it's something to watch for.
Finally, some of the darts "wobble" in the fabric - particularly those on the front. I marked and sewed these very carefully, so as not to distort the seam, but perhaps not carefully enough. Maybe I should have used a tear-away stabilizer. I pressed them within an inch of their life and used a clapper, but still they wobble, mockingly.
Conclusion
Well, I like the idea of this duster. I love the silhouette - especially the nipped in back waist and then the fullness below. I love the sleeve detail. But it definitely presents some fit issues, at least for me, that I haven't quite worked out.Oh, and if you are in one of my sewing groups, such as BABES or PenWAG, don't expect me to bring this to show and tell. It's definitely not show-and-tell worthy. :)
More Pictures