Friday, October 23, 2009

La Fred - Olympia Coat


This is the second of two LaFred patterns I purchased at Artistry in Fashion last month. I had some striped novelty corduroy fabric that, once washed, "puckered" up along those stripes. Yep, a novelty corduroy seersucker. Fabrics are so interesting these days.

The corduroy sat around while I contemplated what to do with it. I am not a huge corduroy fan in general, but this one was so interesting. I knew I wanted a jacket with it, but nothing was grabbing me. I finally decided to use it to sew up the car length coat from this LaFred pattern. Because I was matching stripes and observing the nap, and this has some pretty large pattern pieces, I was grateful to have enough fabric. While this pattern may look pretty traditional, it has some interesting features:

  • The body of the jacket and the sleeve are cut in one piece. This means that the sleeves are on the bias. Because I was using a stripe, this caused the chevron pattern along the top of the sleeve.
  • There is another under sleeve piece cut on the straight of grain. This is attached to a triangular gusset. I found this to be a pretty easy gusset experience and is designed to give a wider range of movement to the shoulders/arms.
  • The pattern features two pocket styles. I opted for the interesting "window pane" pocket which is very easy to make, but looks very "high end." To reduce bulk, I lined the pocket with the lining fabric, but you could also use the fashion fabric.
  • There are two neck styles available - a round neckline and a petal collar. I opted for the round neckline which I wear folded back.
This straight jacket doesn't have a lot of shaping. Based on my high bust measurement, I cut an XL, which had enough ease so I didn't need an FBA. Once I had the outer shell constructed, I decided to remove about 3" from the CB at the hem, tapered to nothing – if I hadn't already constructed the pockets, I would have probably removed it from the side seams. I also shortened the sleeves about 1.5" and I inserted some smallish petal shoulder pads.


(The chevron design is caused by the stripes and bias cut sleeves.)


(I love these chunky black buttons, which I bought at Artistry in Fashion and intended them for another project. The lining is optional, but I lined it with a dark brown crinkled polka dot polyester.)


DD1 feels that this coat is a little oversized and underfitted. It might seem so, given the current more fitted styles, but it's a good use of this interesting fabric and I expect to get a lot of wear from this coat in my chilly, foggy climate.

I think I have now used everything I bought at Artistry in Fashion -- two LaFred patterns and 6 chunky black buttons. This might be a first! :)

Wednesday, October 21, 2009

Halloween 2002

It's hard to believe that it is only 10 days to Halloween. You see, Halloween was always a huge holiday for my family, at least when my kids were little. My Halloween fever would begin in August when I started pestering my kids about what they wanted to be, costume-wise. Usually DD1 would have decided long before, but DD2 would keep me guessing until the last possible second.

I don't know where all my photos are, but I found these low-resolution photos from Halloween 2002. That was the year that DD1 (then almost 10), and her best friend wanted to be "The Girls That Didn't Want to Go to Sleep." And of course they needed matching costumes and they wanted matching teddy bears. So I laid in a supply of flannel from eQuilter.com.

Since DD1 loved to dance, and wanted her costume to twirl, I drafted a nightgown with a circle skirt. Also, since their teddy bears were different sizes, I had to draft a different pattern for each. They also wanted sleeping caps, so I got out my knitting needles and some Encore yarn (an inexpensive acrylic) and knitted each of them (and each of their bears) a sleeping cap.

They wore sheepskin slippers and their bears had matching slippers purchased by H's mom. These were little booties intended for infants and they worked perfectly on the bears.


(They were about to attend a Halloween event at the Academy of Sciences, a week or so before October 31st. DD2's costume wasn't finished, so she went as a cat.)


(Twirling, with H, in the courtyard at the Academy of Sciences.)


(H's bear on the left and DD1's bear on the right.)


Obsessive? Did I hear you call me obsessive? Well, maybe a bit. lol

Then, there was DD2 (age 7 at the time). She always made me crazy when it came to costumes. She was quick with the concept costume that would be impossible to execute well. When she was 3 years old, and I asked her what she wanted to be for Halloween, she immediately responded, "an eyeball." When I asked her again, she just as quickly answered, "a dirty sock." Even at 3 she was a jolly joker.

This particular year she wanted to be (in her words): "An Alien Robot from the Moon." She soundly rejected any robot suggestions that involved boxes and dryer hose. She wanted to have a round head and a silver body suit, cause she wasn't just a robot, but an "alien robot from the Moon, mooom."

One day I was in ToysRUs and noticed the playground balls. I realized that a Scooby Doo playground ball could be perfect for her helmet. I cut it into the right shape to fit over her head and neck and spray painted it silver.

She also wanted a control panel with "working" buttons on her costume. (Well, who wouldn't?) I spent ages in hardware and craft stores looking for suitable buttons and couldn't find any, so I concocted ten of them by gluing plastic curtain rings together, wrapping them with metallic silver thread, and gluing clear circles of plastic on top. My daughter labeled them using a Sharpie. I attached these to her silver lame "control panel". I had a string of clear lights intended for a wreath, so I inserted one of the lights into each button, from behind, through a small slit. I then created a little silver box to hold the battery pack for the lights. When she wanted to, she could turn on the battery pack and her buttons would flash. That was about as operational as it would get.

Besides her silver pants and shirt, which were very easy to sew up, I also made some spats because she didn't want anything to show that wasn't silver. Finally, I made her a silver trick or treat bag (which you see hanging from her waist in the first photo below). The costume was a hit. When she returned home from school, I had to re-glue some buttons and bolts because she was over-fondled by the other children. (Yes, because she was a robot, she had bolts glued to her knees and elbows.) She turned heads as she was trick or treating, buttons flashing in the dark.


(The requisite silly shot just before heading out for trick or treating.)


(You can just make out the 3D pocket for the battery pack under her control panel.)


(Even Alien Moon Robots have to take piano lessons when they occur on Halloween.)


I'll never forget how she told me right after Halloween that next year she wanted to be a keyboard, with keys that actually played notes when you touched them. Nope, that one never happened – I told her when she was older she could design and engineer that herself.

Should I admit that these costumes were long ago given to Goodwill? Yup. We don't generally keep these things forever and I like to think other little girls are enjoying them.

These days, I have nothing to do with costumes. My Halloween duties pretty much begin and end with hosting a sleepover and buying lots of candy. :)

(And sorry my pictures aren't better, but this was before I had gone digital and I came across these old scans. I don't know where the original photos are. Hopefully safely tucked away in some box.)

Monday, October 19, 2009

Sewing Workshop - Salsa Blouse #2

I liked the Salsa pattern so much, I immediately cut into my special Kasuri-inspired stretch woven to make another!

I've already blogged about my authentic kasuri fabric and how this black stretch woven is reminiscent of a kasuri. I wanted something special for this fabric and decided this pattern would be "it." This fabric is, essentially, a stripe. If it had been possible, I would have "fussy" cut it to place the stripes more strategically, but it was just not possible. I barely was able to get the top out of the fabric I had (some of the seam allowances were smaller than they should have been), so I had to let the stripes fall where they may. I think it worked out ok (not perfect, but ok), but I did think about it. :D

Because this is a stretch woven and my last Salsa was made from a knit, you can see this one drapes differently. DD#2 (my photographer) felt that this one is "a bit less flattering" – she commented that this black version makes me look a bit "wider" than the navy. I am not sure I agree, but in the interest of full disclosure, after she said this I popped in some petal shoulder pads for the photos. Unused to shoulder pads, she wasn't sure she liked that effect either, but I do think it improves the line a bit. Not sure if I will wear it this way, but it's an option.

Forgive the silly pictures. Sometimes one tires of trying to make oneself look less hideous in a photo and one is egged on by a certain 14-year-old and one becomes... well maybe a bit silly. :)

At least you can clearly see the lovely texture of this black fabric. The only thing different for this version is that I shortened the sleeves a bit less -- maybe 5" or 6" instead of 8". Still, a lot of shortening. :)


Sunday, October 18, 2009

Sewing Workshop - Salsa Blouse


Finally, a wrap top for the rest of us!!!

Another great pattern from Sewing Workshop, at least for my figure type. :) I eyed the Salsa top pattern for quite awhile before I bought it. Long have I wished for a wearable and flattering wrap top. One that would not be too low cut, nor emphasize my "fluffy" tummy, nor fall open and "share the goods" with the unsuspecting public. I thought Salsa had potential but I wasn't completely sure, since line drawings can be misleading. (Heck, photos can be misleading.)

Finally, I had the pattern in my hot little hands and I whipped it up in some of that nasty nylon knit I've been using for these sorts of muslins. I was prepared to add a full bust dart, and planned to pivot the dart into the "gathers" at the low sides. (I later realized that wouldn't have been so easy, since the "gathers" aren't actually gathers, but carefully placed tucks.)

I usually cut patterns based on my high bust measurement and alter for my full bust, but in this case I cut an XXL, based on my full bust measurement and my waist measurement. Even so, my waist is larger than an XXL by several inches, but I left off the back darts and hoped that the knit I was using would be forgiving enough. (It was!) Otherwise, the fit was quite good (with one caveat below) and I quickly made it up in a navy crepe knit. This pattern features a smallish underarm gusset – I love the fit of an underarm gusset and this gusset is diminutive compared to the one on the Teagarden T.

I was delighted to find that the XXL fit me as I'd hoped, with one exception: The sleeves were freakishly long. I had to cut off 8" on the sleeves. (I measured.) On most patterns, I have to shorten the sleeve by 1" or 2", so I don't know if this pattern is drafted strangely or whether my drapey knit fabric accounted for this anomaly.


Other nice/interesting features of this top:
  • A very flattering asymmetric front hem.
  • A shawl collar, so there is ample fabric where the top crosses over. This results in nice soft folds and gives more bust coverage. (You do want a fabric that will cooperate with this feature.)
  • You can cross this over left over right or right over left. There are side slits (the back is shorter than the front, a very flattering line). Four buttons are sewn on each side, but on the back, not the front. Because of the side slits, it doesn't matter whether you cross left over right or the other way around.

My only fitting caveat (besides the long sleeves) is that where the top buttons, there is a pleat of fabric that isn't intended (you can see it in the photo). I played around with it and don't see how to remove it. If I pull the side seams back so the pleat is not there, the fabric pulls around my tummy, making me look preggers. The pleat does not bother me, but YMMV (your mileage may vary).

I have already cut this top out and started sewing another, this time in black. In fact, I had so much trouble getting one of my kids to have the cycles to photograph me, it's pretty much done already. :)

Sunday, October 11, 2009

Textile O Rama -- Japanese Ikat (Kasuri)

I recently unearthed some fabrics I bought from the now-defunct Kasuri Dyeworks in Berkeley maybe 13 or 14 years ago. This was during my obsessive quilting phase and I am so glad I made the pilgrimage to Kasuri Dyeworks before it closed.

The fabrics I unearthed were mostly Japanese ikats, or kasuri. There was one piece, in particular, that I paid a goodly sum for. These fabrics are typically 14-inches wide (suitable for kimono).

First, take a look at this particular fabric that I bought:


and here is a closeup:


What is amazing about this fabric, is that the indigo dye is applied to the thread before the fabric has been woven. Imagine the accuracy that must go into this process! Now, there are other cultures, such as several in South America, that also use this ikat process, but the resulting woven fabric, while beautiful, does not have the same impressive accuracy of high quality kasuri. And if the technical difficulty wasn't high enough, the traditional kasuri changes the design every several inches, as you can clearly see on my length of fabric.

Gorgeous. I originally bought this fabric thinking I might use it in a quilt, but it was pricey. I recall that this piece (which included one repeat of each of the designs) cost me over $100. Yes, expensive, but certainly worth it for the craftsmanship. However, I chickened out, I guess, because the fabric was lovingly put away and never used.

Now that I have brought it out again, I know I can never cut it. It's too amazing, too precious. So, I may hem the ends and turn it into a table runner. I think the fabric might enjoy that, so long as I keep drippy candles away from it. :)

I recently bought a Japanese fabric that very much reminded me of the traditional kasuri. In this case, every several inches it changes the weave to produce a different pattern. It is a stretch woven fabric, containing a fairly high percentage of lycra.


This fabric is actually black, though it appears to be charcoal in this photo. And, unlike the kasuri, this fabric has been cut and is being sewn up into a top. I'll be posting it once it's finished and I can corral a child into photographing it. :)

Technique -- Machine Dyeing using Procion Dyes

One of my passions is dyeing fabric. I love love to dye fabric. I first experimented with fabric dyeing years ago in a Wearable Art class I took at Canada College. Later, when I started quilting, I became obsessed with gradation dyeing. I bought muslin by the bolt and dyed yards and yards, back in the day. Later, when my children attended a Waldorf kindergarten, I used the same Procion Dyes to dye silks, particularly 36" silk scarves, which are de rigeur playthings for every Waldorf child. I donated many many colorful silk scarves to school fundraisers and I still have a large bag of these in my garage.

Now, I hate to call myself lazy, but I have a certain philosophy regarding... economizing my effort. Simplify simplify. I long ago gave up hand dyeing and started dyeing fabrics in my washing machine. It's so much easier!

If you have been intimidated by dyeing in the past because of all the calculations and effort, really, it doesn't have to be that hard. Yes, if you are going into business and want to produce consistent results, you will have to weigh your fabric, weigh your dyes, estimate your water, make precise calculations, use a consistent fabric, and so on. But, for those of us who want to dye the odd piece of fabric, who cares?

However, before beginning, you need to get into the correct mindset. If you go into this wanting a specific shade or a specific color, you should proceed with caution. It's best to approach this endeavor with a spirit of adventure and open mindedness – "close enough is good enough." With this attitude, you will find that it's fun. It's really really fun. If you hate the results, you can over dye the fabric again, use it for testing patterns, or gift it to someone else who can appreciate a hand dyed fabric in that particular shade. :)

I started machine dyeing using the method on the Dharma Trading website (my favorite vendor for procuring my supplies). I thought I would walk you through my process, so you can see where I have employed my shortcuts on their method.

Why Fiber Reactive Procion dyes? Well, these were my first introduction to dyes because that's what my teacher, Mary Lou Lange, used. She used them because she had good results with them. They are colorfast, easy to use in cold water, and they come in lots of pretty colors. They come in powder form and last forever. I am still using dyes I bought 15 years ago with no degradation or other problems.

You don't have to start with white or natural-colored fabric. If you have a fabric that you like, is a natural fiber (or partly natural), but you hate the color, why not try dyeing it? Except in this case, it's called over-dyeing. You just might love the results.


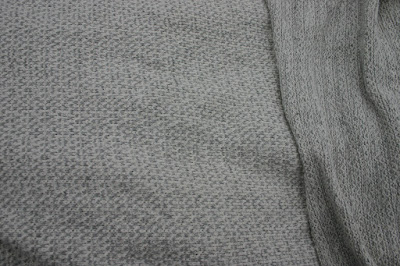
In my case, I had a very uninspiring 100% cotton knit in an oatmeal color with light grey flecks. Blech. This was not a high quality fabric and had been sitting around the fabric store for a long time. I bought a bit over 2 yards for $2 a yard, thinking I could use it for a wearable muslin. It took me awhile to decide what color to dye it. I have quite a few dye colors and don't want to buy any more, though if I did, I think I would have to get that new Oxblood Red color. (By the way, I have NO affiliation with Dharma or Procion.)

I was "feeling" a berry color as I am often told how flattering it is on me, but the only reds I had on hand were Chinese Red and Fire Red, neither of which were calling to me, so I decided to experiment and mix the Fire Red (#10) with a bit of Navy Blue (#24). If you look at the color chart you will see that some colors have an asterisk beside them and some have two. This means that you need more of those dyes to achieve the saturation shown on the sample chart. One asterisk means twice as much dye and two asterisks means four times as much.

You also have to take the type of fabric into account. Silk loves dyes and absorbs them readily, as does rayon. Cotton can be a bit more problematic. A long-staple cotton can take dyes well, unless it has been treated by something that will inhibit the dye, such as a permanent press finish, but some cottons that are more "slubby", made from a shorter staple thread (like my knit) can be more resistant to accepting the dye.

This is where calculations might intimidate you. Don't let them. I had two-plus yards of a cotton knit plus one diaper. Why a diaper? Well, for 17 years now I have been using cloth diapers as rags. When I make up a dye bath, I throw in a diaper or two, or maybe a pillowcase, just because it makes me smile. :) I don't do more than that because I don't want those extra fabrics to "steal" too much of the dye.

Anyway, for such a small amount of fabric, I use the Small setting on my washer. (You do need a top-loading washing machine for dyeing fabrics because the fabric needs to be submerged at all times. It's why I will never buy a front loading washing machine.)


A note about using powdered dyes: you want to be careful around the undissolved dye. You do not want to be inhaling this stuff. When I used to do a lot of dyeing, I would wear a mask and gloves. Now that I dye fabrics very very rarely, I am more casual about these precautions. However, once I open the dye container, I hold it away from my face, and breathe very shallowly during the actual slurry-making process. Once I have measured the dyes into the cup, I place the lid firmly back on the dye container and place it back on the shelf. I do not wait and risk a possible spillage. Once the dye is mixed and added to the dye bath, I wash down the area where I was measuring the dye. Any residual grains of powdered dye can be very problematic the next time I wash a load of light colored clothing. :) I also immediately wash the cup and spoon used to mix the dye.


The following steps describe how to create a fabric similar to mine:

  • Assemble your tools and supplies: Procion Dyes in your chosen color, salt, soda ash fixer, fabric, washing machine, empty gallon jug (for mixing salt water and soda ash solution), cup (for mixing dye), spoon (I use a standard plastic spoon). Optional: urea, synthropol, mask, gloves.
  • Prewash and dry the fabric to remove sizing, dirt, etc. You can use synthropol or you can wash it as you normally do.
  • Dissolve the salt in warm water. I used one cylindrical carton of Morton's salt from the grocery store for this project, which is about 2.5 cups. You might notice that the instructions call for non-iodized salt. I have dyed hundreds of yards over the years with regular iodized salt and had no problems whatsoever, but if you have non-iodized, you might want to use that for "best results." I would be curious to know how non-iodized salt improves the process.
  • Set your washer to a Small load (for this small amount of fabric, I've also used extra large loads for large amounts of fabric) and Warm/Cool. Start the cycle so that the tub begins to fill.
  • Add the dissolved salt to the washing machine.
  • Mix your dye. In my case, I measured three heaping spoons (using a regular plastic spoon) of Fire Red (#10) into a cup. Had I wanted a very deep color, I would have used twice as much since this is an asterisk'd color, but I was economizing on my dye. To that, I added one half of a heaping spoon of Navy Blue (#24). (It was probably about 1.5 teaspoons by Imperial measure.) I then added a small amount of warm water and stirred with the plastic spoon to make a slurry. I then added a bit more water and stirred some more. Continue adding warm water in small increments until the dye is completely dissolved. For years I used plain warm water, but if you first dissolve urea into that warm water, it can minimize lumping. You do not want any lumps. If in doubt, strain the solution through a piece of silk or a coffee filter. Once the dye is dissolved, I add additional water – in total, I add about 1 cup of warm water to the dye mixture.
  • Add the dissolved dye to the washing machine.
  • Let the machine agitate for a minute or two.
  • Add the fabric to the machine.
  • Re-set the machine to start from the beginning of the cycle. My machine has a 15 minute agitation cycle. You want to agitate the fabric for 20 minutes before adding the soda ash solution, so I set a separate timer for 15 minutes to remind myself to re-set the machine to the beginning of the cycle before it empties out my precious dye bath.
  • While the fabric is agitating, mix up the soda ash solution. The soda ash is essential to this process – it "fixes" the dye to the fabric in a chemical bond – this is why the dye is so colorfast. I added roughly 1/3 cup (I didn't bother measuring) to my gallon jug and then filled it about halfway with warm water. Put the lid on and shake it up to thoroughly dissolve.
  • Once the fabric has agitated for 20 minutes, start adding the soda ash solution. You may notice that Dharma recommends doing this over a 15 minute period. This is too tedious for me, so I add it over a 2 minute period: I add some, let it agitate, add some more, let it agitate, add the rest.
  • The fabric needs to agitate for 30 - 60 minutes, depending on how saturated you want the results to be. For this oatmeal fabric, I agitated for over 60 minutes. I take my timer with me everywhere I go in the house so I don't forget to re-set the washer before it empties.
  • After the fabric has agitated the desired length of time, let the washing machine finish the cycle.
  • Wash out the residual dye. I usually leave the fabric in the washer and put it through one or two regular cycles, with detergent or synthropol. (I typically prewash the fabric in regular detergent and use synthropol for the post-dyeing cycles.) Dry the fabric as desired. (I throw it into the dryer.)
To be on the safe side, after machine dyeing, I wash only dark loads for two or three loads. I've never had a problem, but I like to be safe. :) 
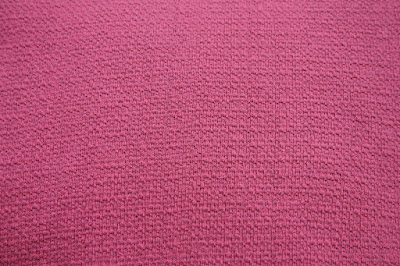
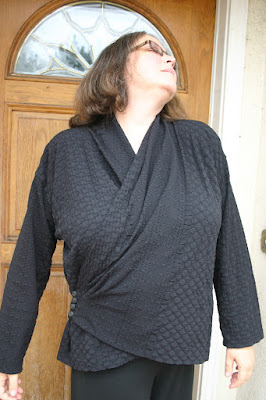
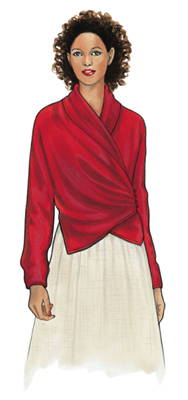
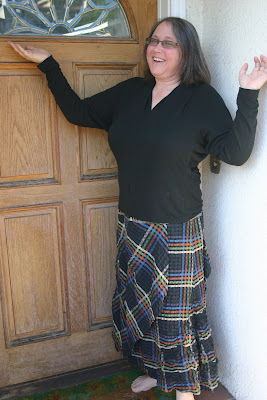
Voila. I will use this berry-colored fabric to test out one of the new patterns in my pile, like maybe the Fuji Mountain top. :)

Friday, October 2, 2009

Vogue 1018 - Sandra Betzina Skirt (#2)


I've repeated myself! I liked this Sandra Betzina skirt so much, I made it again. This time, in a sheer plaid novelty seersucker. My thinking was that the play of the plaid over plaid (at different angles) would be interesting visually. However, once I had washed the plaid fabric, it puckered up so much that the fabric no longer seems particularly sheer, so I'm not sure you can appreciate this effect in the final skirt. Oh well.

My alterations for this skirt are the same as last time: the drape was cut so the grain was parallel to the front. The waistband was converted to elastic with a rectangular yoke. The skirt was lined with a striped sheer black fabric. (I assumed that three layers of sheer fabrics would be opaque enough. If not, well, I like my legs, so enjoy. ;)


I'm not quite done with this pattern yet. I think I need to make it again, in a solid black jersey. :)

Sewing Workshop - Teagarden T


Oooh, I love this t-shirt! This design, based on a classic Issey Miyake design, is wonderful and I am soooo glad that Sewing Workshop has made the pattern available. It consists of two pattern pieces, not counting the neck interfacing pattern piece: the front/back/sleeve/collar (all in one), and the underarm gusset. Now, this gusset can be problematic for some folks, particularly those who bear no resemblance to the Venus of Willendorf (in which case, see the next paragraph). But for us busty folk, the gusset is vunderbar!!! It adds fullness just where you need it and the fullness doesn't overwhelm you anywhere else.

In my case, I cut out a Large, based on my high bust measurement, and removed the curvature at the waist – nice straight lines for me, thank you very much. (It's like sewing for a guy, in that regard.) That's it, that is the only change I made. I first sewed the top up in a very nasty nylon knit (which I've found is excellent for scrubbing dirty floors and counters), and it fit perfectly!

If you don't need the huge gusset and don't desire the "design line" of fabric drooping under your armpits, you might want to use the gusset reducing instructions posted by Linda.

Because this is a Miyake design, there are certain resemblances to origami in its construction. This means that the pattern pieces have many places you must mark. These marks have labels: A, B, C, and so on, up through K. Some people use colored tailor tacks to keep them all straight. That is brilliant, but I am much too lazy to use ELEVEN different colors of thread for my tailor tacks. What I did was use little round sticky labels and put them next to each tailor tack, on the underside of the fabric. So I made 6 labels for F, and two labels for A, for example. If they threatened to fall off, I just pinned those labels on. :)


I do recommend making a muslin, just to get it straight what you are doing. The first time (on the muslin) I blindly followed the instructions, and then I understood the basic idea so the second one was much easier. I still needed those labels, though. I have to remember not to get cocky and leave off those labels, which is exactly the kind of thing I would do. ;)

I need ten or twenty of these tops, all in black. (I apologize, in advance, for those who see me on a regular basis and will have to endure the many tops I plan to make from this pattern.) Oh, because I did cut this out at night and the light over my dining table is poor, I cut it on the crossgrain. The knit is a four-way, but it's much stretchier in the other direction. No matter, it's just fine. :)


Note to self. Buy a few boxes of sticky labels at the office supply store.

Thursday, October 1, 2009

Self Drafted - Ivan Grundahl Stripe Experiment

I love stripes. I love sewing with stripes — how they can morph in 3D and really change the look of a garment, depending on how they are cut and used. When I saw this fun Ivan Grundahl top on an upscale website for $245, I was intrigued. I could immediately see the pattern piece in my mind that would yield this effect. On the left side of the garment, the side seam is virtually parallel to the fabric grain - a very traditional layout. But on the right side of the garment, the side seam is perpendicular to the grain of the fabric. Therefore the side seams would be about 90 degrees in relation to each other, instead of parallel.


My instinct was that a top like this would look horrible on me, but I was intrigued anyway. I came across some very nice, soft, cotton interlock for $2 a yard, so I bought three yards (60" or thereabouts) and I whipped up this top. Mine was yellow and white because that was the only choice available, but I prefer the black and white of the original.

I basically took a tank top that fit me at the neck/arm, and I laid it against the pattern paper. Starting at the center front, I traced about an inch of the neckline, pivoted the garment away from the front, traced another inch, pivoted the garment further, traced another inch, and so on. I ended the pivot&trace when the side seam was about 90 degrees (roughly) from the CF. I then traced the armhole.

The resulting pattern piece looked similar to this:


I bound the neck and armhole edges with the same fabric, positioning it so that only the yellow showed. And, yes, this looks ATROCIOUS on me. It emphasizes that which needs no emphasis and totally hides my better features. My daughter told me it looked like a maternity top on me. Therefore, all you get to see is the hanger version:


Now, I could give this away to a tall willowly, small chested sort, who could actually look good in it, but, instead, I think I will use it as a cheerful sleep shirt. For now. Hey, it only cost me about $7, so it was worth the experiment. ;)